初めに
CakePHPを利用したプロジェクトを作成する際、UIは適当で良いので、とにかく動作させたいという場合に、Bootstrapを利用することも多いと思います。本当によく考えられているCSSフレームワークだと思います。
適用方法としてはいくつかあり、素のBootstrap CSS を読み込ませて適用する方法もありますが、CakePHPのFormヘルパーとは合わなくなってしまいます。もちろんヘルパーを使わず適用することもできます。
しかし、GitHub で公開されれている FriendsOfCake/bootstrap-ui を利用すると、FormヘルパーのHTMLタグ出力をBootstrap に(ある程度)合わせた形で出力してくれます。ヘルパーが嬉しいのは、edit画面やcreate画面でvalueやエラー要素をHTMLに適用してくれることです。<input type=”text”>のような単純なのはヘルパーでなくとも簡単ですが、select やoption などはループ処理を書くことなく使えるのがメリットです。細かいHTML構造の融通が利かないことがデメリットになることもあります。(CakePHPにはヘルパーが出力するHTML構造を自力で調整できる仕組みもあります。)
Bootstrap5 対応のブランチがあることに気が付いたので、試してみたいと思います。以下は5のブランチです。

準備
OS : Xserverホスティング上で動かしてみます。
testapp.example.app で公開することにします。プロジェクトフォルダは、testapp です。Xserver管理パネルで事前にサブドメイン登録をしておきます。
composer, php(cli) の準備をしておきます。
# composer は独自にローカルに入れてあり、php(cli)  は、シンボリックリンクで PHP8.0.12 が動作するように環境を整えています。composer が最新のため、PHP8としています。CakePHP自体はPHP7.2以上が必要です。
$ composer -V
Composer version 2.2.9 2022-03-15 22:13:37

$ php -v
PHP 8.0.12 (cli) (built: Oct 22 2021 18:35:15) ( NTS )

$ which php
~/bin/php

$ ls -al ~/bin
-rwxr-xr-x  1 example members 2364320  3月 20 11:03 composer
lrwxrwxrwx  1 example members      15  3月 13 15:02 php -> /usr/bin/php8.0
CakePHP 4.3 + bootstrap-ui
CakePHPインストール
composer からインストールします。
$ cd /home/example/example.app/  # ホスティングユーザーは、example
$ composer create-project --prefer-dist cakephp/app:4.* testapp
Creating a "cakephp/app:4.*" project at "./testapp"
Info from https://repo.packagist.org: #StandWithUkraine
Installing cakephp/app (4.3.1)
  - Installing cakephp/app (4.3.1): Extracting archive
Created project in /home/example/example.app/testapp
Loading composer repositories with package information
Updating dependencies
Lock file operations: 90 installs, 0 updates, 0 removals
  - Locking brick/varexporter (0.3.5)
#....
# いろいろパッケージリストが出て、いくつかのプラグインを信頼しますか?と出ますので、y で進みます。
#....
cakephp/plugin-installer contains a Composer plugin which is currently not in your allow-plugins config. See https://getcomposer.org/allow-plugins
Do you trust "cakephp/plugin-installer" to execute code and wish to enable it now? (writes "allow-plugins" to composer.json) [y,n,d,?] y
dealerdirect/phpcodesniffer-composer-installer contains a Composer plugin which is currently not in your allow-plugins config. See https://getcomposer.org/allow-plugins
Do you trust "dealerdirect/phpcodesniffer-composer-installer" to execute code and wish to enable it now? (writes "allow-plugins" to composer.json) [y,n,d,?] y
  - Installing symfony/polyfill-mbstring (v1.25.0): Extracting archive
#....
# 処理が進み、ディレクトリパーミッションを設定しますか?と聞かれるので、y で進みます。
#....
Set Folder Permissions ? (Default to Y) [Y,n]? y
データベースを適当に用意しておきます。
testapp/config/app_local.php を開いて、DB情報をセットします。
今回は、先にUsersというテーブルを用意しました。(ここでは詳しく扱いません。)
ドキュメントルートを調整します。
CakePHP は、プロジェクト/webroot が基本のドキュメントルートなので、Webサーバーのドキュメントルートからシンボリックリンクを張っておきます。
testapp.example.app というサブドメインを用意した場合の一例:
本来のドキュメントルート:/home/example/example.app/public_html/testapp/
CakePHP のドキュメントルート:/home/example/example.app/testapp/webroot
cd /home/example/example.app/public_html
mv testapp testapp_org
ln -s ../testapp/webroot testapp
CakePHP確認
testapp.example.appにアクセスして、確認します。
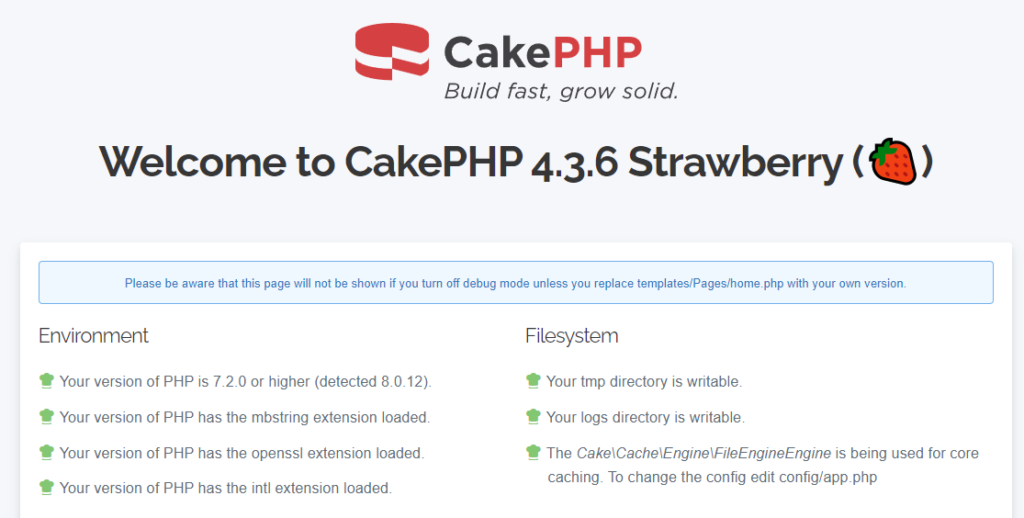
Bootstrap UI インストール
composer を使ってインストール
リポジトリ登録
bootstrap-ui 5 は、まだpackagist に登録されていないため、GitHubからソースを直接取得します。
composer コマンドを使って、GitHub から、bootstrap-ui を直接インストールするため、composer にリポジトリを登録します。
[testapp]$ composer config repositories.friendsofcake/bootstrap-ui vcs https://github.com/FriendsOfCake/bootstrap-ui
インストール
ブランチ名「bs5」を指定しています。
[testapp]$ composer require friendsofcake/bootstrap-ui:dev-bs5
./composer.json has been updated
Running composer update friendsofcake/bootstrap-ui
Loading composer repositories with package information
Updating dependencies
Lock file operations: 1 install, 0 updates, 0 removals
  - Locking friendsofcake/bootstrap-ui (dev-bs5 e974cb5)
Writing lock file
Installing dependencies from lock file (including require-dev)
Package operations: 1 install, 0 updates, 0 removals
  - Downloading friendsofcake/bootstrap-ui (dev-bs5 e974cb5)
  - Installing friendsofcake/bootstrap-ui (dev-bs5 e974cb5): Extracting archive
Generating autoload files
54 packages you are using are looking for funding.
Use the `composer fund` command to find out more!
BootstrapUIの設定・適用
プロジェクトがboostrap-ui プラグインを読み込むようにします。Application.phpを手動で編集しても同じです。
[testapp]$ bin/cake plugin load BootstrapUI
/home/example/example.app/testapp/src/Application.php modified
vendor 以下に入ったbootstrap のリソースファイル群をwebrootから使えるようにします。
testapp/webroot/bootstrap_u_i というシンボリックリンクが作成され、実体は、
testapp/vendor/friendsofcake/bootstrap-ui/webroot です。
[testapp]$ bin/cake bootstrap install
Clearing `node_modules` folder (this can take a while)...
Cleared `node_modules` folder.
Installing packages...
npm WARN bootstrap-ui No repository field.
npm WARN bootstrap-ui No license field.

added 3 packages in 1.55s
Packages installed successfully.
Refreshing package asset buffer...
All buffered files cleared.
All files buffered.
Removing possibly existing plugin assets...

For plugin: BootstrapUI
-------------------------------------------------------------------------------

Done
Linking plugin assets...

For plugin: BootstrapUI
-------------------------------------------------------------------------------
Created symlink /home/example/example.app/testapp/webroot/bootstrap_u_i

Done

Installation completed.
Formヘルパー利用の際、bootstrap-ui ヘルパーが標準で効くようにAppView.php内を編集します。手動でも良いですが、 bakeコマンドが用意されています。
[testapp]$ bin/cake bootstrap modify_view
Modifying view...
Modified `/home/example/example.app/testapp/src/View/AppView.php`.
# AppView.php の基底クラスが、BootstrapUI\View\UIView となります。
レイアウトテンプレートファイルをプロジェクト内にコピーします。
[testapp]$ bin/cake bootstrap copy_layouts
Copying sample layouts...
Sample layouts copied successfully to `/home/example/example.app/testapp/templates/layout/TwitterBootstrap/`.
Usersテーブルを対象にCRUDの画面ができるよう、bakeコマンドで必要なファイル一式を生成します。Usersモデル、エンティティ、コントローラー、テンプレートが生成されます。
[testapp]$ bin/cake bake all Users -t BootstrapUI
BootstrapUIの確認
確認します。データは fakerを使って挿入しました。(説明略)
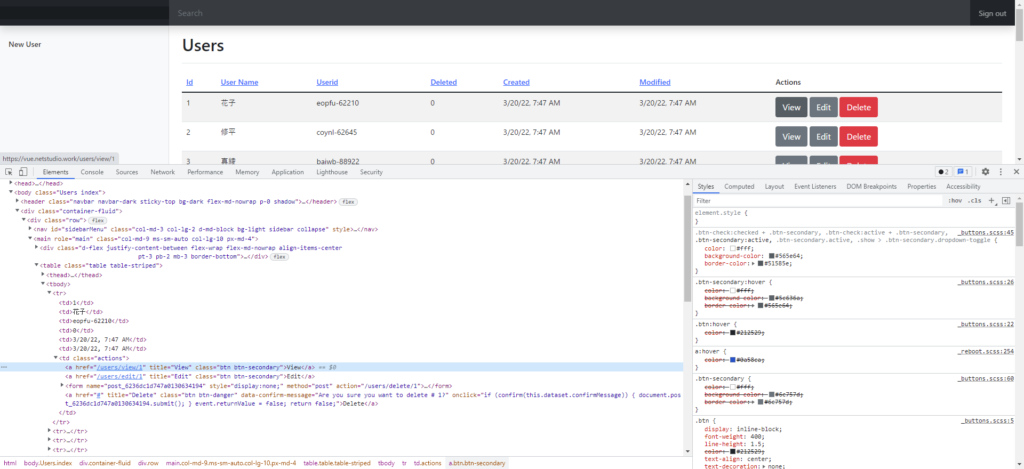
タグおよびインスペクターを見ると、bootstrap が適用されています。
Editボタンを押してみます。

Users/edit.php テンプレートは以下の様になっています。注目するところは、
- 7行目 BootStrapUI のレイアウトが読まれるようになっている。
- 20-23行目 Formヘルパーが使用されている。特別な指定はしていない。
<?php
/**
 * @var \App\View\AppView $this
 * @var \App\Model\Entity\User $user
 */
?>
<?php $this->extend('/layout/TwitterBootstrap/dashboard'); ?>

<?php $this->start('tb_actions'); ?>
<li><?= $this->Form->postLink(__('Delete'), ['action' => 'delete', $user->id], ['confirm' => __('Are you sure you want to delete # {0}?', $user->id), 'class' => 'nav-link']) ?></li>
<li><?= $this->Html->link(__('List Users'), ['action' => 'index'], ['class' => 'nav-link']) ?></li>
<?php $this->end(); ?>
<?php $this->assign('tb_sidebar', '<ul class="nav flex-column">' . $this->fetch('tb_actions') . '</ul>'); ?>

<div class="users form content">
    <?= $this->Form->create($user) ?>
    <fieldset>
        <legend><?= __('Edit User') ?></legend>
        <?php
            echo $this->Form->control('user_name');
            echo $this->Form->control('userid');
            echo $this->Form->control('password');
            echo $this->Form->control('deleted');
        ?>
    </fieldset>
    <?= $this->Form->button(__('Submit')) ?>
    <?= $this->Form->end() ?>
</div>
echo $this->Form->control(‘user_name’); で生成されるHTMLは以下の通りです。
<div class="mb-3 form-group text required">
    <label class="form-label" for="user-name">User Name</label>
    <input type="text" name="user_name" required="required"
        data-validity-message="This field cannot be left empty"
        oninvalid="this.setCustomValidity(''); if (!this.value) this.setCustomValidity(this.dataset.validityMessage)"
        oninput="this.setCustomValidity('')"
        id="user-name"
        aria-required="true"
        class="form-control"
        value="花子"
        maxlength="20" >
</div>
Bootstrap のHTMLの形になっています。このスタイルの場合4,5の違いはありませんが、required 属性のため、setCustomValidity() が付加されています。

以下は、Editボタンで編集に入りそのまま保存して一覧に戻ってきた画面です。Flashに注目してください。タグに、「bi-check-circle-fill」があり、アイコンはBootstrap Icons が使用されています。

上記は、Basicなフォームですが、他にも、Horizontal Form/Inline Form も使えます。
他にも、Bootstrap5のコンポーネントを Formヘルパー経由で利用できます。
他のコンポーネントの利用について、以下に公式の説明があります。

感想
まだ正式版になっていませんが使える印象です。開発してくださっている方に感謝です。
