Windows 上の xampp システムに、無料のSSLであるLet’s Encrypt を設定したとき、最新のやり方は少し違っていたので、まとめます。
Windows10Pro
Apache(ApacheFriedndsのXAMPP の一部)
対象コモンネーム:test.example.com
証明書を発行する対象のFQDNが存在することが必要です。
test.example.com に証明書を発行したいなら、DNSにAレコードが登録されていて、そのホストがすでに稼働している必要があるという意味です。
win-acem をインストール
証明書発行とその後の更新まで設定してくれるすごく便利なツールです。
公式ダウンロード:https://www.win-acme.com/

zipファイルをダウンロードして適当な所に解凍します。
例:d:\win-acme
証明書作成
今回は、証明書を作成し、Windowsのタスクスケジューラーにタスクを登録して証明書が自動更新されるようし、Apache 自体への証明書インストールなどは手動で行います。また、ワイルドカード証明書ではない通常の証明書です。
Windowsツールだけあって、IISの場合はデフォルトで簡単に設定できるようです。(今回言及していません。)
ツール実行
PowerShell(管理者)を開いて、wacs.exe が存在するフォルダに移動します。
# Dドライブにダウンロードしてzipをそのまま解凍しました。
cd D:\tools\win-acme.v2.1.20.1185.x64.pluggable
./wacs.exe
各種情報入力して進めます。
Apache なので、自動設定を避け、今回はすべてマニュアルで進みます。(何をやっているかわかりやすいという理由もあります。)
メインメニュー
M: Create certificate (full options) を選びます。
A: Manage renewals (1 total) となっているのは、すでに一つ証明書を作成した後のためです。
A simple Windows ACMEv2 client (WACS)
 Software version 2.1.20.1185 (release, pluggable, standalone, 64-bit)
 Connecting to https://acme-v02.api.letsencrypt.org/...
 Scheduled task looks healthy
 Please report issues at https://github.com/win-acme/win-acme

 N: Create certificate (default settings)
 M: Create certificate (full options)
 R: Run renewals (0 currently due)
 A: Manage renewals (1 total)
 O: More options...
 Q: Quit

Please choose from the menu: M
作成方法選択
IISではないので、2: Manual input を選択します。
Running in mode: Interactive, Advanced
 Source plugin IIS not available: No supported version of IIS detected.

 Please specify how the list of domain names that will be included in the
 certificate should be determined. If you choose for one of the "all bindings"
 options, the list will automatically be updated for future renewals to
 reflect the bindings at that time.

 1: Read bindings from IIS
 2: Manual input
 3: CSR created by another program
 C: Abort

 How shall we determine the domain(s) to include in the certificate?: 2
# Apacheなので、2: Manual input とします。
コモンネーム入力
ホスト名、つまりCommon Name(コモンネーム)を入力します。
また、win-acme 上で設定が保存されますが、その中で識別したい名前があれば指定します。
Description:        A host name to get a certificate for. This may be a
                     comma-separated list.

 Host: test.example.com
# ホスト名を入力します。
 Source generated using plugin Manual: test.example.com

 Friendly name '[Manual] test.example.com'. <Enter> to accept or type desired name: <Enter>
# フレンドリー名(つまりわかりやすい名前)を指定します。ここでは Enter を押します。
認証方法選択
コモンネーム所有者の正当性チェックをどのように行うのかを決定します。ワイルドカード証明書の場合は、DNS認証しか使えませんが、単一ホストの証明書の場合簡単な方法をとります。
1: [http-01] Save verification files on (network) path
を選んで、自身のドキュメントルート上にファイルを生成し、認証局側からそのファイルにアクセスして認証させるようにします。
 The ACME server will need to verify that you are the owner of the domain
 names that you are requesting the certificate for. This happens both during
 initial setup *and* for every future renewal. There are two main methods of
 doing so: answering specific http requests (http-01) or create specific dns
 records (dns-01). For wildcard domains the latter is the only option. Various
 additional plugins are available from https://github.com/win-acme/win-acme/.

 1: [http-01] Save verification files on (network) path
 2: [http-01] Serve verification files from memory
 3: [http-01] Upload verification files via FTP(S)
 4: [http-01] Upload verification files via SSH-FTP
 5: [http-01] Upload verification files via WebDav
 6: [dns-01] Create verification records manually (auto-renew not possible)
 7: [dns-01] Create verification records with acme-dns (https://github.com/joohoi/acme-dns)
 8: [dns-01] Create verification records with your own script
 9: [tls-alpn-01] Answer TLS verification request from win-acme
 C: Abort

 How would you like prove ownership for the domain(s)?: 1
ドキュメントルート設定
自動生成される認証ファイルをドキュメントルートに置くので、ドキュメントルートフォルダを入力します。
次の、「Copy default web.config before validation?」では、なぜかエンターキーなしで進むので、「y 」+ エンターキー と勢いでやってしまうと先に進んでしまいます。y だけを押しましょう!
 Description:        Root path of the site that will serve the HTTP validation
                     requests.

 Path: C:/virtualhost/test.example.com/htdocs

 Description:        Copy default web.config to the .well-known directory.
 Default:            False
 Argument:           False (press <Enter> to use this)

 Copy default web.config before validation? (y/n*) - yes
CSRのキータイプを指定
2: RSA key を選びます。
 After ownership of the domain(s) has been proven, we will create a
 Certificate Signing Request (CSR) to obtain the actual certificate. The CSR
 determines properties of the certificate like which (type of) key to use. If
 you are not sure what to pick here, RSA is the safe default.

 1: Elliptic Curve key
 2: RSA key
 C: Abort

 What kind of private key should be used for the certificate?: 2
証明書の保存場所
証明書を指定したフォルダに保存しますので、「2: PEM encoded files」とします。後で自動更新の際にここで指定した場所が使用されるので、適当なフォルダではなく、apache\conf\ssl など、実際に証明書を置くフォルダにします。
When we have the certificate, you can store in one or more ways to make it
 accessible to your applications. The Windows Certificate Store is the default
 location for IIS (unless you are managing a cluster of them).

 1: IIS Central Certificate Store (.pfx per host)
 2: PEM encoded files (Apache, nginx, etc.)
 3: PFX archive
 4: Windows Certificate Store
 5: No (additional) store steps

 How would you like to store the certificate?: 2
秘密鍵ファイルのパスワード
無しとしますので、「1: None」を選択します。
 Description:        .pem files are exported to this folder.

 File path: C:\xampp\apache\conf\ssl

 Description:        Password to set for the private key .pem file.

 1: None
 2: Type/paste in console
 3: Search in vault

 Choose from the menu: 1
証明書発行
他にやることがあるか聞かれるので、
5: No (additional) 続けて、 3: No (additional)
とします。すぐに、証明書発行プロセスが開始されます。
最後に、一旦「q」で終わります。
1: IIS Central Certificate Store (.pfx per host)
 2: PEM encoded files (Apache, nginx, etc.)
 3: PFX archive
 4: Windows Certificate Store
 5: No (additional) store steps

 Would you like to store it in another way too?: 5

 Installation plugin IIS not available: No supported version of IIS detected.

 With the certificate saved to the store(s) of your choice, you may choose one
 or more steps to update your applications, e.g. to configure the new
 thumbprint, or to update bindings.

 1: Create or update bindings in IIS
 2: Start external script or program
 3: No (additional) installation steps

 Which installation step should run first?: 3

 First chance error calling into ACME server, retrying with new nonce...
 Cached order has status invalid, discarding
 [test.example.com] Authorizing...
 [test.example.com] Authorizing using http-01 validation (FileSystem)
 Answer should now be browsable at http://test.example.com/.well-known/acme-challenge/raLeZbOM5JgeJBRzHFECZphZ435GZZk-v2A15eJVRNQ
 Preliminary validation failed because 'An error occurred while sending the request.'
 [test.example.com] Authorization result: valid
 Downloading certificate [Manual] test.example.com
 Store with PemFiles...
 Exporting .pem files to C:\xampp\apache\conf\ssl
 Installing with None...
 Scheduled task looks healthy
 Adding renewal for [Manual] test.example.com
 Next renewal scheduled at 2022/6/3 9:17:39
 Certificate [Manual] test.example.com created

 N: Create certificate (default settings)
 M: Create certificate (full options)
 R: Run renewals (0 currently due)
 A: Manage renewals (3 total)
 O: More options...
 Q: Quit

 Please choose from the menu: q
[test.example.com] Authorization result: valid
という行が出ていれば成功です。表示されているメッセージで、
- Download…. → 証明書のダウンロード
- Scheduled task looks healthy… → 更新タスクのスケジュール登録
というような文字列があれば成功です。
うまくいかない時は、エラーメッセージに理由が出ています。
確認
証明書が発行されたかフォルダーを確認
C:\xampp\apache\conf\ssl\test.example.com-chain.pem # 証明書+中間証明書 Apache 2.4.8以降
C:\xampp\apache\conf\ssl\test.example.com-chain-only.pem # 中間証明書のみ SSLCertificateChainFile に設定するとき
C:\xampp\apache\conf\ssl\test.example.com-crt.pem # 証明書
C:\xampp\apache\conf\ssl\test.example.com-key.pem # 秘密鍵
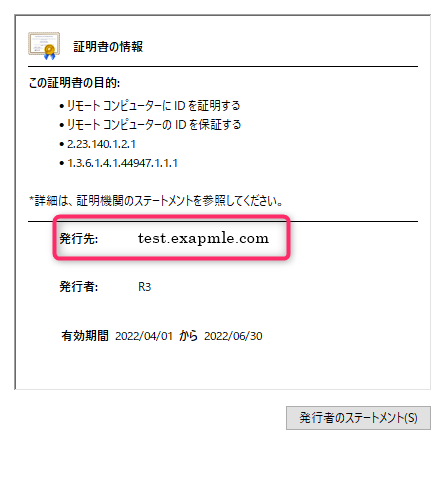
Apacheの設定
ssl.confに証明書ファイルを設定し、apacheを再起動します。ブラウザでアクセスし証明書の期限などが表示されていれば成功です。うまくいかない時は、Apacheの設定を見直したりログを確認します。
更新タスクを確認
証明書の期限は2カ月と短いので、頻繁に更新が必要となりますが win-acem はこれを自動的にやってくれます。
Windowsのタスクスケジューラにタスクが登録されているか確認します。
(下記はシェルコマンドの実行例です。。タスク名は異なるかもしれません。)
複数証明書でもタスクは一つです。
# powershell コマンドライン
schtasks /Query /TN "win-acme renew (acme-v02.api.letsencrypt.org)"

Folder: \
TaskName                                 Next Run Time          Status
======================================== ====================== ===============
win-acme renew (acme-v02.api.letsencrypt 2022/04/10 12:45:23    Ready
win-acme 上での管理情報を確認します。
A: Manage renewals を選択します。
(2 total) となっているのは、すでに二つの証明書を管理しているという意味です。
.\wacs.exe

 N: Create certificate (default settings)
 M: Create certificate (full options)
 R: Run renewals (0 currently due)
 A: Manage renewals (2 total)
 O: More options...
 Q: Quit

 Please choose from the menu: A

 Welcome to the renewal manager. Actions selected in the menu below will be
 applied to the following list of renewals. You may filter the list to target
 your action at a more specific set of renewals, or sort it to make it easier
 to find what you're looking for.

 1: [Manual] www.example.com - renewed 1 time, due after 2022/5/3 9:17:39
 2: [Manual] test.example.com - renewed 1 time, due after 2022/5/26 17:25:48

 Currently selected 2 of 2 renewals

 E: Edit renewal
 F: Apply filter
 S: Sort renewals
 D: Show details for *all* renewals
 R: Run *all* renewals
 U: Analyze duplicates for *all* renewals
 C: Cancel *all* renewals
 V: Revoke certificate(s) for *all* renewals
 Q: Back

 Choose an action or type numbers to select renewals:
まとめ
設定後、しばらくして確認してみましたが、無事自動的に更新が行われていました。
win-acem を使えば、簡単にSSL証明書設定・更新ができます。開発者に感謝です。